Originally shared as a column for CIT Newsletter.
With online video, interpreter educators have greater access to a wider variety of video sources – both for the purposes of teaching and scholarship. With the profusion of video resources, our work sometimes is that of curator – helping our students or proteges to navigate through all of the information that exists and find useful nuggets that propel them forward on their professional journey.
With English, we often do this by providing excerpts from written pieces. Technologically, the technique of “cut & paste” is pretty well established, even for those of us who are digital immigrants. What I want to share today is techniques for working with YouTube videos to do a similar process – to create a link that only shares an excerpt of a longer video.
Prior to showing you how to do it, I wanted to give you a couple of examples of how this can be integrated into both teaching and more scholarly writing.
The toggles below contain
- an example of using the technique for teaching,
- a quick sketch of more academic integration of video quotes,
- an in-depth explanation of how the techniques work, and
- a quick reference for the snippets of code.
I hope this is a useful resource for you in your teaching and scholarship.
Scholarship Example
Integrating Video into Scholarship
In a previous article, I wrote about the ways that we can create more engaging academic discourse – looking at both English and ASL. Today, I want to share a technique that can be used to quote from ASL video sources.
The example below is not a full blown academic research paper, but it gives a taste of what is possible. To view each video quote, simply click on the video frame. You can also turn on the CC for each video if you want to have English translation for the ASL.
Role Models for Academic ASL
As ASL becomes a language of the utilized for academic purposes, it’s important to address a question raised by Dr. Ben Bahan in a presentation at StreetLeverage.
The answer to this question may be more evident for interpreters working in school settings, but Dr. Bahan sees it as having more broad applications. He states,
One way that interpreters can build their competency with academic ASL is see some of the variety of ways that research is being conveyed in ASL. pepNET has examples of videos explaining research in ASL that use innovative techniques. The following example focused on the importance of role models for facilitating the building of social capital starts with a young deaf girl entering a restaurant to place an order.
In an interview with Sorenson Communications, Claudia Gordon shared some of her own motivation to work to achieve what she has and be a role model for others.
From this quote, it is easy to see why Claudia Gordon was lifted up as a role model.
While this is not a complete article – and perhaps not the most insightful analysis, I hope this gives some sense of how video quotes can be incorporated into an online publication. (I also wanted to provide some links to good resources that can be tied into discussions of Academic ASL, particularly the two links to pepNET videos that showcase research:
- Role Models as Facilitators of Social Capital for Deaf Individuals: A Research Synthesis
- Assessing English literacy as a predictor of postschool outcomes in the lives of Deaf individuals. By, Carrie Lou Garberoglio, Stephanie Cawthon, and Mark Bond.
Teaching Example
Teaching Example: Providing Consecutive Interpreting Practice
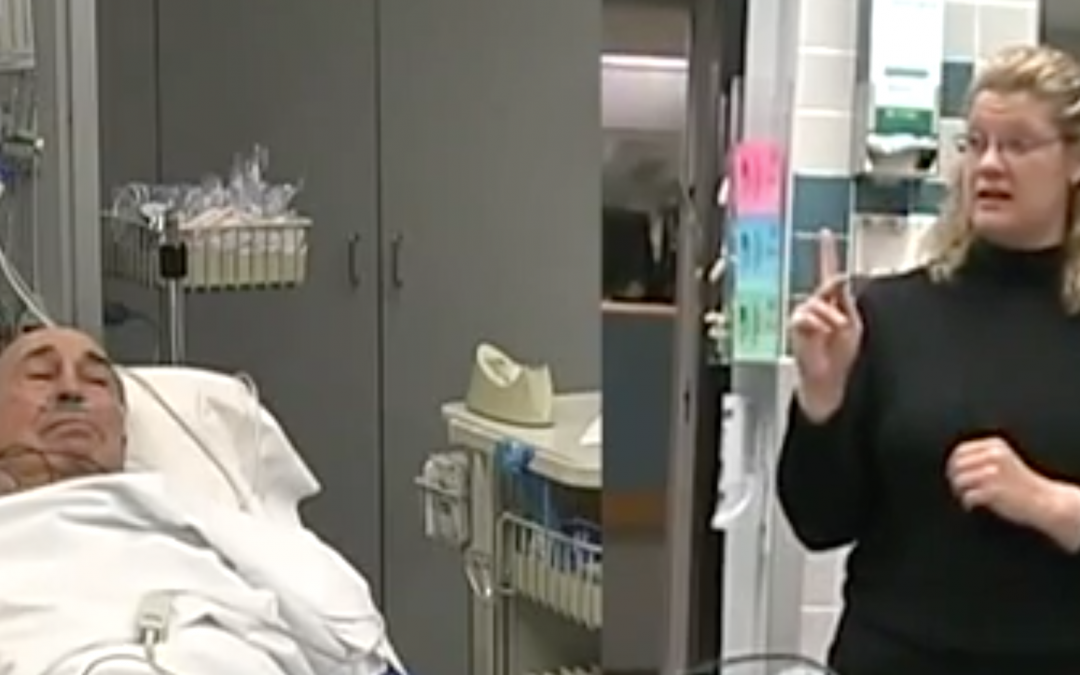
Making clips of video can be an opportunity to take a text and segment it for consecutive interpreting practice. I used this technique in posting video from a project for the CATIE Center at St. Catherine University called “Hurry Up & Wait.” This resource follows a deaf patient going through a visit to the Emergency Department of a hospital. Each section of the interaction is presented in a variety of ways.
- Consecutive format: each turn between hearing and deaf participants is a separate video. People using the resource can move between turns at their own pace.
- With Interpretation: Two cameras were used to capture the original interpretation so people can view a more complete picture of the interaction
- Simultaneous format: the video flows at the pace of the original filming – with the interpretation edited out – so that people can practice interpreting at the original pace.
For the consecutive format, the project was originally created on DVD. DVD technology allows you to use one video and create “chapters” within each video. So, I was able to do this easily on DVD. As we transferred this project online, that same technology didn’t work. Originally, I had to create individual video files for all of the turns (a laborious and more technical project, in part because it meant captioning all of the individual videos.) Now, YouTube allows for the same effect with a simple use of code for the URL for the video – a much less time-consuming project as well as one that is simpler for people without a lot of tech experience to carry out. Here are the first two turns.
Patient – Turn 1
Patient – Turn 2
You can see the complete resource here. The important point is that with the technique described below, you can take any video on YouTube and do a similar process to segment it for your students to practice with.
How it Works
How it Works
With a YouTube video, you can use it in a variety of ways. The simplest is to generate a URL that you can link to which directs people to view the video. You will see this option below a video if you look at the Share tab. It looks like this:

If you copy the link, there are snippets of code you can add that adjust how it is displayed.
Related videos
At the end of a YouTube video, multiple videos often pop up that give you options of clicking on. These are called “Related Videos” though I am sometimes unsure what the connection is. If you don’t want these to be shown, you can add this code:
“?rel=0” (That is a zero. In HTML links, “?” separates a URL from the additional code that modifies how a link acts. “0” means “off” and “1” means “on.” So, “rel=0” translates to “related videos are off.”
Start Time
If you are only interested in picking a specific start time in the video, YouTube offers this automatically. Below the link, is a box asking if you want to start something at a specific time point, check the box like below.

By checking the box, you see the URL now is changed to {https://youtu.be/gAQ_Kt1tRmQ?t=1m37s}. Which means that the link will jump to the time code of 1 minute, 37 seconds in the video. It will then proceed to the end of the entire video.
Start and End Times
If you want to include both a Start and End times, you need to use a different snippet.
With a YouTube Video, you can add the Start and End time to a video clip by adding on the code “start=#” and “end=#”. Note the additional snippets of code need to be separated by an “&”.
So, if you want a segment that starts at the 2 second mark and ends at the 8 second mark, it would look like this:
{https://youtu.be/gAQ_Kt1tRmQ?start=2&end=8}
An important note, this code uses only seconds, and does not include an “s” to mark that it is second. In the example for adding a Start Time, the code was “1m37s” for 1:37. If you wanted to start there using this code, you need to convert 1:37 into the number of seconds – so 60+37=97 seconds. So the code would be: “start=97”
Altering the Display
If you don’t just want to put a link to the standard YouTube page, you can also display the video full screen in a link. To do so, you need to use the following format for the URL:
https://www.youtube.com/embed/Z2yyLy85MS8?rel=0&start=2&end=8
(Click on the link to see how it works. It will open in a new tab.)
Embedding the Video in a Web Site
If you want to do something similar to what I have done in this page, you need to use the “Embed” option from the Share menu on YouTube.

You see the check boxes that allow you to select options. By leaving “Show Suggested videos….” unchecked, YouTube inserts the “rel=0″ snippet in the code.
<iframe width=”560″ height=”315″ src=”https://www.youtube.com/embed/Z2yyLy85MS8?rel=0″ frameborder=”0” allowfullscreen></iframe>
If you want to add a Start time of 1:45 and End time of 2:22, insert the snippet right after ?rel=0. It is important that you start with an “&” and place it inside the “. So, it should look like this:
<iframe width=”560″ height=”315″ src=”https://www.youtube.com/embed/Z2yyLy85MS8?rel=0&start=105&end=142″ frameborder=”0” allowfullscreen></iframe>
This needs to be included in the Text or Code editor of page, not the Visual Editor. If you put it as code, it will show a video like this. If you don’t understand the difference between Visual and Text editors, this might not be a usual option.
Summary of Code Snippets
Quick Reference
As a quick resource, here is a summary of the snippets:
- Shortened URL for YouTube video: https://youtu.be/videoID
- URL for Video that plays full screen: https://www.youtube.com/embed/videoID
- Separator Video ID from Modifying Code: ?
- Turn off Suggested Videos: rel=0
- Start Time: start=#seconds
- End Time: end=#seconds
- Connector for Code Snippets: &
- Embed Code for a Web Page: <iframe width=”560″ height=”315″ src=”https://www.youtube.com/embed/VideoID?rel=0&start=105&end=142″ frameborder=”0″ allowfullscreen></iframe>
Note: VideoID is the series of numbers, letters and symbols that represent the unique ID for each video. In the example above, Z2yyLy85MS8 is the VideoID.
I hope these tips are helpful for you in making the most of videos on YouTube.
If you have any questions or suggestions to add, please feel free to contact me.